Migrasi situs web mungkin terdengar seperti tantangan teknis yang berat, penuh risiko waktu henti, kehilangan data, atau tautan rusak. Namun, memindahkan situs Anda ke layanan khusus Hosting WordPress Seringkali memberikan manfaat signifikan dalam hal performa, keamanan, dan dukungan khusus. Kabar baiknya, dengan pendekatan dan alat yang tepat, Anda dapat mentransfer situs web Anda ke lingkungan hosting WordPress baru dengan lancar dan aman, meminimalkan gangguan apa pun.
Panduan ini akan memandu Anda melalui langkah-langkah penting untuk memastikan migrasi yang sukses, baik Anda pindah dari negara lain menjadi tuan rumah ketik atau sekadar mengganti host WordPress.
Mengapa Bermigrasi ke Hosting WordPress?
Sebelum kita membahas "bagaimana", mari kita bahas "mengapa". Migrasi ke hosting WordPress khusus menawarkan beberapa keuntungan menarik:
- Kinerja yang Dioptimalkan: Server disetel dengan baik untuk WordPress, menghasilkan waktu muat yang lebih cepat.
- Keamanan yang Ditingkatkan: Tindakan keamanan khusus melindungi terhadap kerentanan WordPress.
- Pembaruan & Pencadangan Otomatis: Banyak penyedia menangani pembaruan inti WordPress dan menyediakan pencadangan otomatis, sehingga mengurangi upaya manual Anda.
- Dukungan Ahli: Akses ke tim dukungan yang berpengetahuan tentang masalah khusus WordPress.
- Lingkungan Pementasan: Ideal untuk menguji perubahan sebelum meluncurkannya.
Jika Anda mencari manfaat ini, migrasi adalah usaha yang layak dilakukan.
Daftar Periksa Pra-Migrasi: Persiapkan Transfer yang Lancar
Persiapan adalah kunci migrasi yang bebas stres. Jangan lewatkan langkah-langkah krusial ini!
1. Pilih Host WordPress Baru Anda
Ini adalah langkah pertama dan terpenting. Pilih penyedia hosting WordPress tepercaya yang sesuai dengan kebutuhan situs Anda. Pertimbangkan faktor-faktor seperti:
- Fitur: Apakah mereka menawarkan pementasan, pencadangan otomatis, atau caching?
- Pertunjukan: Periksa ulasan dan spesifikasi server.
- Mendukung: Apakah tim dukungan mereka berpengetahuan tentang WordPress?
- Skalabilitas: Bisakah rencana Anda berkembang seiring dengan situs Anda?
2. Cadangkan Seluruh Situs Web Anda Saat Ini
Ini tidak bisa dinegosiasikan. Sebelum melakukan apa pun, buat cadangan lengkap situs web Anda yang sudah ada. Ini harus mencakup:
- Semua File WordPress: Seluruhnya
wp-kontenfolder (tema, plugin, unggahan) dan semua file inti WordPress lainnya. - Basis Data WordPress Anda: Semua kiriman, halaman, komentar, pengaturan, dan data plugin Anda disimpan di sini.
- Cara Mencadangkan:
- Plugin: Gunakan plugin cadangan WordPress khusus seperti UpdraftPlus, Duplikator, atau Migrasi WP All-in-OnePlugin ini menyederhanakan seluruh proses pencadangan dan pemulihan.
- cPanel/Manual: Jika Anda memiliki cPanel, gunakan "Backup Wizard" untuk mengunduh cadangan lengkap. Anda juga dapat menggunakan FTP untuk mengunduh berkas dan phpMyAdmin untuk mengekspor basis data Anda.
- Cara Mencadangkan:
3. Hapus Cache dan Nonaktifkan Plugin Cache
Jika Anda menggunakan plugin caching (seperti WP Super Cache, WP Rocket, W3 Total Cache) atau caching tingkat server, nonaktifkan plugin tersebut di komputer Anda. tua situs sebelum migrasi. Caching terkadang dapat menampilkan konten yang sudah usang atau mengganggu proses migrasi.
4. Perbarui Inti WordPress, Tema, dan Plugin
Pastikan instalasi WordPress Anda saat ini, semua tema, dan semua plugin diperbarui ke versi terbaru. Ini meminimalkan masalah kompatibilitas selama migrasi ke lingkungan server baru.
5. Dokumen Pengaturan dan Kredensial Penting
Catatlah:
- Login panel kontrol hosting Anda saat ini.
- Login panel kontrol hosting WordPress baru Anda.
- Login pendaftar domain Anda.
- Semua catatan DNS khusus (misalnya, untuk layanan email, CDN).
- Kredensial FTP untuk host lama dan baru.
- Pengaturan versi PHP saat ini.
Proses Migrasi Langkah demi Langkah
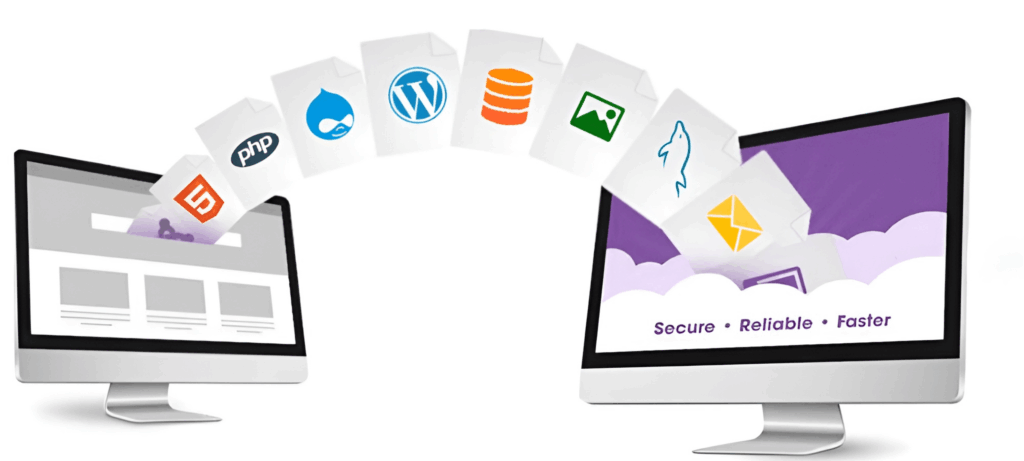
Biasanya ada dua metode utama untuk memigrasikan situs WordPress Anda: menggunakan plugin migrasi (disarankan untuk sebagian besar pengguna) atau melakukan migrasi manual.
Metode 1: Menggunakan Plugin Migrasi WordPress (Direkomendasikan untuk Sebagian Besar)
Ini adalah metode termudah dan teraman bagi sebagian besar pengguna, terutama jika Anda tidak nyaman dengan operasi basis data manual atau FTP. Plugin seperti Duplikator atau Migrasi WP All-in-One mengotomatiskan sebagian besar proses.
- Instal Plugin Migrasi di Situs Lama:
- Masuk ke dashboard situs WordPress lama Anda.
- Pergi ke Plugin > Tambah Baru dan cari plugin migrasi pilihan Anda (misalnya, Duplicator, All-in-One WP Migration).
- Instal dan aktifkan.
- Buat Paket/Ekspor Situs Anda:
- Ikuti petunjuk plugin untuk membuat "paket" (Duplicator) atau "ekspor" situs Anda. Proses ini menggabungkan seluruh instalasi WordPress Anda (file dan basis data) menjadi satu atau beberapa file yang dapat diunduh.
- Unduh semua file yang dihasilkan ke komputer Anda.
- Siapkan Hosting WordPress Baru:
- Jika host baru Anda memiliki installer WordPress sekali klik, Anda dapat menginstal instance WordPress baru terlebih dahulu. Beberapa plugin migrasi bahkan tidak memerlukan ini, cukup direktori kosong. Periksa dokumentasi host baru Anda atau petunjuk plugin.
- Pastikan domain Anda diarahkan ke host baru Anda (lihat Langkah 4 di bagian "Pasca-Migrasi"). Saat pengujian, Anda dapat mengedit berkas host lokal untuk melihat pratinjau situs Anda di server baru tanpa memengaruhi lalu lintas langsung.
- Unggah & Instal di Host Baru:
- Untuk Duplikator: Unggah file installer.php dan file archive.zip ke direktori root (misalnya,
publik_html) dari Anda baru akun hosting menggunakan FTP atau File Manager cPanel. Lalu, navigasikan kedomainbaruanda.com/installer.phpdi peramban Anda dan ikuti panduan instalasi. - Untuk Migrasi WP All-in-One: Instal sebuah segar Instans WordPress di host baru Anda. Kemudian, instal dan aktifkan plugin All-in-One WP Migration di situs baru yang kosong ini. Buka Migrasi WP All-in-One > Impor, lalu seret berkas yang diekspor ke kotak impor.
- Untuk Duplikator: Unggah file installer.php dan file archive.zip ke direktori root (misalnya,
- Tinjau dan Finalisasi:
- Setelah plugin menyelesaikan prosesnya, biasanya ia akan menangani pembaruan basis data, perubahan URL, dan penempatan file.
- Periksa situs web Anda secara menyeluruh untuk memastikan semuanya berfungsi dengan benar.
Metode 2: Migrasi WordPress Manual (Lebih Teknis)
Metode ini memberi Anda kendali penuh tetapi membutuhkan pemahaman teknis lebih lanjut.
- Basis Data Cadangan (Situs Lama):
- Masuk ke host lama Anda cPanel.
- Pergi ke phpMyAdmin (di bawah “Basis Data”).
- Pilih database WordPress Anda, klik tab “Ekspor”, pilih “Cepat” atau “Kustom” (untuk opsi lainnya), dan simpan
.sqlke komputer Anda.
- File Cadangan (Situs Lama):
- Hubungkan ke host lama Anda melalui FTP (menggunakan klien seperti FileZilla).
- Unduh seluruh direktori instalasi WordPress Anda (biasanya
publik_html) ke komputer Anda.
- Buat Database Baru (Host Baru):
- Masuk ke cPanel host baru Anda.
- Pergi ke Basis Data MySQL® (di bawah “Basis Data”).
- Membuat sebuah basis data baru dan sebuah pengguna baru untuk itu. Berikan pengguna semua hak istimewa pada basis data baru. Catat nama basis data, nama pengguna, dan kata sandinya.
- Sunting
wp-config.php(Berkas Lokal):- Di komputer Anda, buka
wp-config.phpfile dari file WordPress yang Anda unduh. - Perbarui nama database, nama pengguna, dan kata sandi untuk mencerminkan kredensial basis data baru yang baru Anda buat di host baru Anda.
- Opsional: Jika nama domain Anda berubah, Anda dapat menambahkan baris ini (ganti dengan domain Anda) sebelum itu
/* Itu saja, berhenti mengedit! Selamat menerbitkan. */baris untuk menangani pembaruan URL:PHPmendefinisikan('WP_HOME','http://domainbaruanda.com'); mendefinisikan('WP_SITEURL','http://domainbaruanda.com');(Ingatlah untuk menghapus baris ini atau memperbaruinya setelah berhasil bermigrasi jika Anda perlu mengakses situs melalui URL sementara untuk pengujian.)
- Di komputer Anda, buka
- Unggah File (Host Baru):
- Hubungkan ke host baru Anda melalui FTP.
- Unggah semua file WordPress yang Anda unduh ke direktori root (misalnya,
publik_html) dari akun hosting baru Anda.
- Impor Basis Data (Host Baru):
- Masuk ke cPanel host baru Anda.
- Pergi ke phpMyAdmin.
- Pilih basis data baru yang kosong Anda ciptakan.
- Klik tab “Impor”, pilih
.sqlfile yang Anda ekspor dari situs lama Anda, lalu klik “Go.”
- Perbarui URL di Basis Data (jika diperlukan):
- Jika nama domain Anda berubah atau Anda tidak menggunakannya
wp-config.phpTriknya, Anda perlu memperbarui URL lama di basis data. Ini penting untuk mencegah tautan rusak. - Anda dapat menggunakan plugin seperti Pencarian Lebih Baik Ganti di situs baru Anda setelah impor, atau jalankan kueri SQL secara manual (lebih lanjut):SQL
PERBARUI wp_options MENGATUR nilai_opsi = ganti(nilai_opsi, 'http://domainlama.com', 'http://domainbaru.com') DI MANA nama_opsi = 'rumah' ATAU nama_opsi = 'url situs'; PERBARUI wp_posts MENGATUR posting_konten = ganti(post_content, 'http://domainlama.com', 'http://domainbaru.com'); PERBARUI wp_posts MENGATUR panduan = ganti(guid, 'http://domainlama.com', 'http://domainbaru.com'); PERBARUI wp_postmeta MENGATUR meta_nilai = ganti(nilai_meta, 'http://domainlama.com', 'http://domainbaru.com');Catatan: Mengganti
opsi_wp,wp_posts,wp_postmetadengan awalan tabel Anda sebenarnya jika berbeda.
- Jika nama domain Anda berubah atau Anda tidak menggunakannya
Pasca Migrasi: Langkah Terakhir

Setelah berkas dan basis data situs Anda berada di server baru, beberapa langkah penting tersisa.
1. Arahkan Nama Domain Anda (Pembaruan DNS)
Di sinilah Anda memberi tahu internet bahwa situs web Anda sekarang ada di host baru Anda.
- Temukan Nameserver: Penyedia hosting baru Anda akan memberi Anda nameserver mereka (misalnya,
ns1.newhost.com,ns2.newhost.com). - Pembaruan di Panitera: Masuk ke pendaftar domain Anda (misalnya, GoDaddy, Namecheap, host Anda saat ini jika mereka juga pendaftar Anda).
- Temukan opsi untuk mengelola “Nameserver” untuk domain Anda.
- Ganti nameserver lama Anda dengan yang baru.
- Waktu Perambatan: Perubahan DNS dapat terjadi 24-48 jam untuk disebarkan sepenuhnya di internet. Selama periode ini, beberapa pengunjung mungkin melihat situs lama, dan beberapa yang baru.
2. Uji Situs Web Anda Secara Menyeluruh
Setelah propagasi DNS dimulai, uji secara ekstensif situs migrasi Anda pada host baru:
- Semua Halaman & Postingan: Klik setiap tautan.
- Gambar & Media: Pastikan semua gambar dan media yang tertanam dimuat dengan benar.
- Formulir: Uji formulir kontak, formulir berlangganan, dan elemen interaktif lainnya.
- Plugin & Tema: Verifikasi semua fungsi yang disediakan oleh plugin dan tema Anda berfungsi sebagaimana mestinya.
- Login: Pastikan Anda dapat masuk ke dasbor admin WordPress Anda.
- Tautan Rusak: Gunakan pemeriksa tautan rusak daring untuk menemukan masalah yang tersisa.
3. Siapkan Sertifikat SSL
Jika situs Anda menggunakan HTTPS (dan seharusnya!), pasang sertifikat SSL di host baru Anda. Sebagian besar host berkualitas menawarkan SSL Let's Encrypt gratis, yang biasanya dapat Anda pasang melalui pengelola SSL/TLS cPanel.
4. Hapus Situs Web Lama (Setelah Konfirmasi)
Setelah Anda benar-benar yakin situs web Anda berjalan sempurna di host baru dan DNS telah disebarkan sepenuhnya, Anda dapat membatalkan akun hosting lama dan menghapus file situs lama. Jangan lakukan ini sebelum waktunya!
Kesimpulan
Memigrasikan situs web Anda ke yang baru Hosting WordPress Lingkungan migrasi tidak harus menjadi mimpi buruk. Dengan mengikuti pendekatan terstruktur, dimulai dengan pencadangan menyeluruh, dan memilih metode yang tepat (terutama menggunakan plugin migrasi yang ramah pengguna), Anda dapat memastikan transisi yang lancar dengan waktu henti minimal. Upaya yang dicurahkan untuk migrasi yang aman akan sepadan ketika Anda merasakan peningkatan kinerja, keamanan, dan fitur-fitur khusus dari host WordPress baru Anda.
Siap memberikan situs web WordPress Anda rumah premium yang layak? Quape, perusahaan web hosting dan domain terkemuka di Singapura, menawarkan solusi Hosting WordPress berkinerja tinggi yang dirancang untuk kecepatan, keamanan, dan manajemen yang mudah. Dengan Quape, Anda akan mendapatkan manfaat dari lingkungan yang dioptimalkan yang memastikan migrasi Anda hanyalah awal dari kehadiran online yang lebih cepat dan andal. Jelajahi paket Hosting WordPress Quape hari ini dan lakukan migrasi Anda dengan percaya diri!


- Cara Masuk ke Dashboard WordPress dengan Mudah - 30 September 2025
- Lupa Kata Sandi WordPress? Cara Mengatur Ulangnya dengan Mudah - 29 September 2025
- Cara Login cPanel dengan Mudah untuk Pemula - 27 September 2025