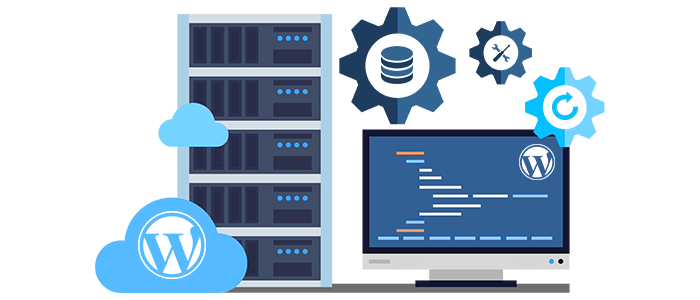
Upgrading from shared hosting to a Server Pribadi Virtual (VPS) is a major step that grants you root access, superior resources, and total control over your website’s environment. However, this power comes with responsibility: there is no “one-click installer” (like Softaculous) on a fresh VPS.
Instead, you must manually install the web server, database, and programming language—collectively known as the LAMP Stack (Linux, Apache, MySQL, PHP) atau LEMP Stack (Nginx)—before installing WordPress itself.
This guide simplifies the entire manual installation process on a Linux (Ubuntu/Debian) VPS.
Steps to Install WordPress on a VPS
Phase 1: Preparation and SSH Access
Before you begin, ensure you have an active VPS account with Quape and know your server’s IP address and root login credentials.
Step 1: Connect to Your VPS via SSH
You need to use a terminal application (like PuTTY for Windows or Terminal for macOS/Linux) to connect securely to your server.
ssh root@YOUR_SERVER_IP_ADDRESSYou will be prompted to enter your root password. Once connected, you’ll see the command line interface (CLI).
Step 2: Update Your System
Always run an update to ensure your software repositories and installed packages are current.
sudo apt update
sudo apt upgrade
Phase 2: Installing the LAMP Stack (The Foundation)
The LAMP stack provides the necessary environment to run WordPress. We will install Apache (the web server), MySQL (the database), and PHP (the programming language).
Step 3: Install the Web Server (Apache)
Apache is responsible for serving your website files to visitors.
sudo apt install apache2To verify it’s running, open your browser and navigate to http://ALAMAT_IP_SERVER_ANDA. You should see the default Apache “It works!” page.
Step 4: Install the Database Server (MariaDB/MySQL)
WordPress needs a database to store all its content (posts, users, settings). We will use MariaDB, a popular drop-in replacement for MySQL.
sudo apt install mariadb-serverNext, run the security script to lock down your database installation:
sudo mysql_secure_installation- Follow the prompts: set the root password, remove anonymous users, disallow remote root login, and remove the test database.
Step 5: Install PHP and Required Modules
PHP is the language WordPress is written in. You need PHP and several specific modules for WordPress to function correctly.
sudo apt install php libapache2-mod-php php-mysql php-curl php-gd php-mbstring php-xml php-zip- Restart Apache: To enable PHP processing via Apache, you must restart the web server.
sudo systemctl restart apache2Phase 3: Setting Up the WordPress Database
Now, we create a dedicated database, username, and password for your WordPress installation. This is much safer than using the database root account.
Step 6: Log in to the Database CLI
Use the secure root user you set up in Step 4.
sudo mysql -u root -pEnter the MariaDB root password when prompted.
Step 7: Create the Database, User, and Grant Privileges
Run the following commands, replacing new_database_name, new_username, Dan strong_password with your desired, unique, and secure credentials:
-- 1. Create a new database
CREATE DATABASE new_database_name;

-- 2. Create a new user that will manage the database
CREATE USER 'new_username'@'localhost' IDENTIFIED BY 'strong_password';

-- 3. Grant the new user full privileges on the new database
GRANT ALL PRIVILEGES ON new_database_name.* TO 'new_username'@'localhost';

-- 4. Apply the changes
FLUSH PRIVILEGES;

-- 5. Exit the database CLI
EXIT;
Penting: Write down your database name, username, and password.
Phase 4: Downloading and Configuring WordPress
With the LAMP stack and database ready, we can now install the WordPress files.
Step 8: Navigate to the Web Root Directory
We typically install WordPress in Apache’s default web root directory, which is /var/www/html/.
cd /var/www/html/Step 9: Download and Extract WordPress
Gunakan wget command to download the latest WordPress package and then unzip it.
sudo wget [https://wordpress.org/latest.tar.gz](https://wordpress.org/latest.tar.gz)
sudo tar -xvzf latest.tar.gz
This extracts the files into a new folder named wordpress/.
Step 10: Move Files and Set Permissions
We need to move the contents of the wordpress/ folder directly into the html/ directory and ensure the web server (Apache user: www-data) has ownership so WordPress can function.
# Move contents from 'wordpress' folder to 'html' folder
sudo mv wordpress/* .

# Set ownership to Apache user (www-data)
sudo chown -R www-data:www-data /var/www/html/

# Set correct directory and file permissions
sudo find /var/www/html/ -type d -exec chmod 755 {} \;
sudo find /var/www/html/ -type f -exec chmod 644 {} \;
Step 11: Configure the WordPress File
WordPress uses a configuration file named wp-config.php. It needs to be created from the sample file provided.
sudo cp wp-config-sample.php wp-config.phpNow, open the file using a text editor (like nano) to input your database credentials:
sudo nano wp-config.phpFind the lines defining the database details and input the credentials you created in Step 7:
// ** MySQL settings - You can get this info from your web host ** //
/** The name of the database for WordPress */
define( 'DB_NAME', 'new_database_name' );

/** MySQL database username */
define( 'DB_USER', 'new_username' );

/** MySQL database password */
define( 'DB_PASSWORD', 'strong_password' );
Save the file (Ctrl+O, then Enter) and exit the editor (Ctrl+X).
Phase 5: Finalizing the Installation
Step 12: Run the 5-Minute Installation
Open your web browser and navigate to your server’s IP address:
http://ALAMAT_IP_SERVER_ANDAYou will now see the standard WordPress welcome screen.
- Select your language.
- Masukan Anda Site Title.
- Choose your Nama Pengguna Admin (must be different from your database user).
- Set a strong Kata Sandi Admin for the WordPress dashboard.
- Enter your email address.
Klik “Install WordPress,” and your manual VPS installation is complete!
Master Your Site with Quape’s Dedicated Power
Installing WordPress manually on a VPS gives you total control over performance, which is vital for speed and security. However, this level of customization requires a high-quality, stable server environment.
Quape provides premium Server Khusus Dan Hosting VPS plans built on high-speed infrastructure. Whether you choose the LAMP or LEMP stack, Quape gives you the robust foundation and expert support needed to confidently manage and scale your self-hosted WordPress installation.
Ready to take full control and maximize your website’s performance? Explore Quape’s powerful VPS options today and leverage your technical expertise.


- Cara Install WordPress di VPS Langkah demi Langkah - 10 Oktober 2025
- Cara Install WordPress di Subdomain dengan Mudah - 10 Oktober 2025
- Cara Install WordPress di cPanel Langkah demi Langkah - 9 Oktober 2025